I’ve been hearing a LOT about Tailwind lately and wanted to try it out. I’ve been procrastinating since I really didn’t want to spend the money on it at this point. “I can just pop on and pin a few times a day, no problem!” I said. However, I took another look and thought I’d try it for two months and see how it goes. If you’ve been thinking about getting started, here’s exactly what I did last night!
**This post contains affiliate links which means that I receive a bonus if you buy from my link. There’s no additional cost to you, and in this case, you get a bonus too!**
The first thing to do is to find someone’s affiliate link to Tailwind. This will get you at least a month free!
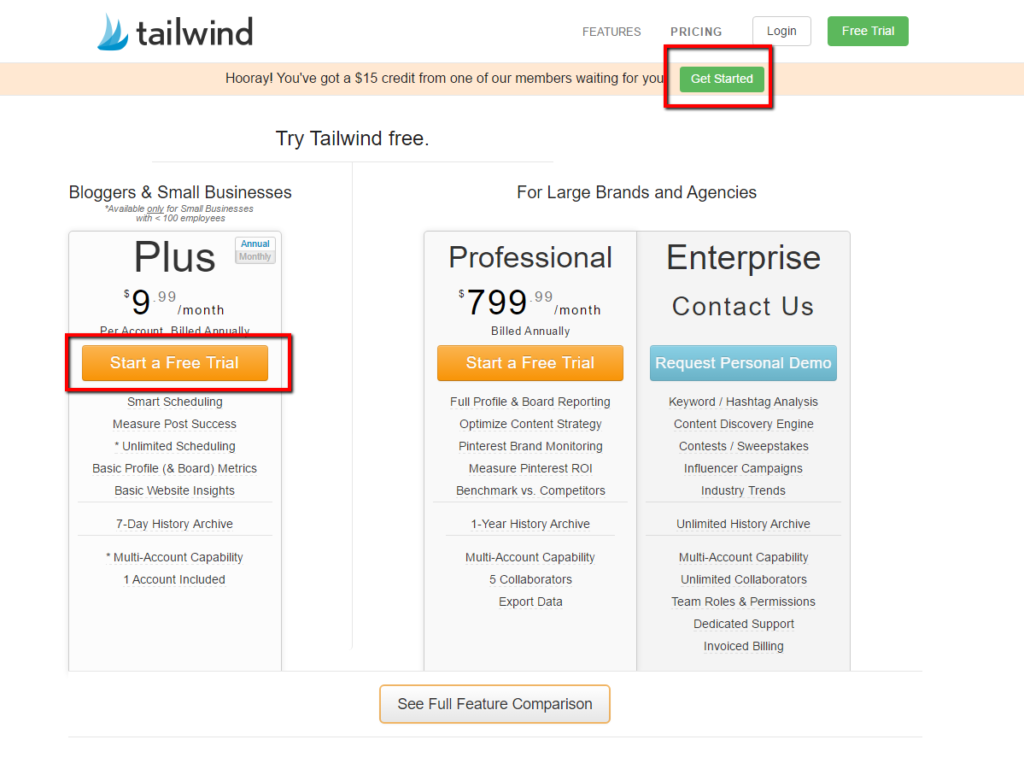
Step 1: On the Tailwind website, click on either of getting started links. I highlighted them for you in my screenshot; your screen should look a lot like this one.
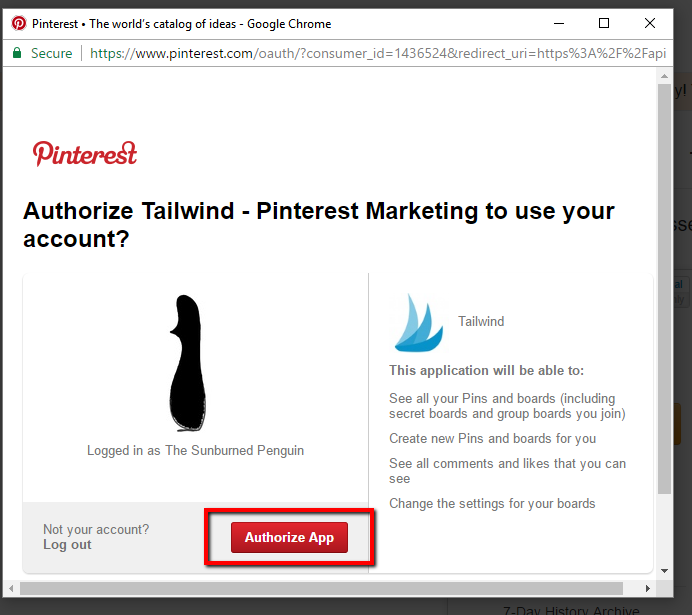
Step 2: Next, you’ll need to let Pinterest know it’s ok for Tailwind to access your account. If you aren’t already logged in to Pinterest, then your popup may look different than mine and you’ll have to put in your username/password. But since I was logged in, all I had to do was click the “Authorize” button to link them up.
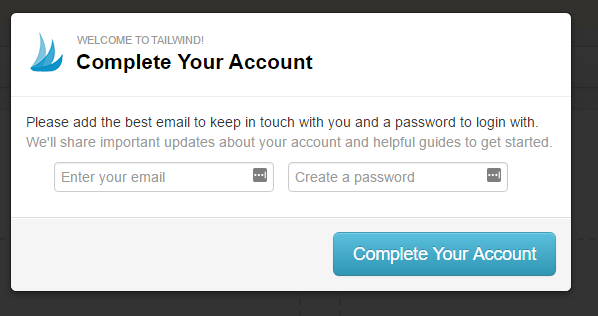
Step 3: To complete the setup of your Tailwind account, put in your email address and create a password. That’s it for the setup! No credit card needed or anything. Super easy!
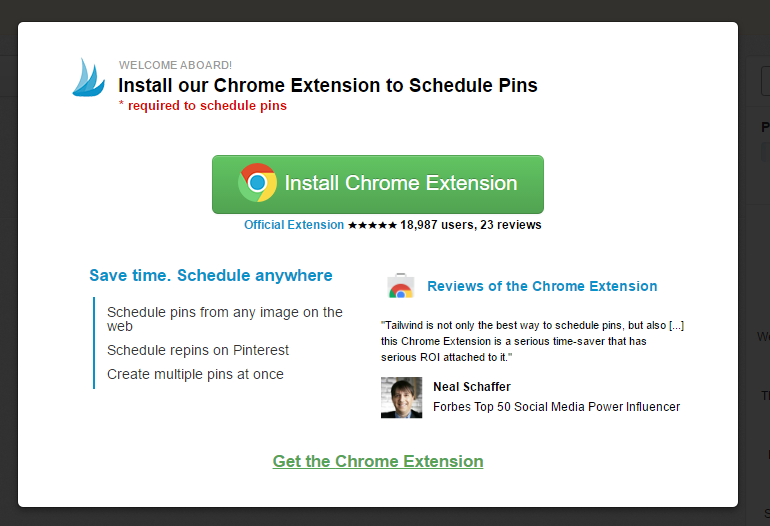
Step 4: Next, Tailwind will ask you to install their browser extension. This screenshot is of Chrome, since that’s the browser I use. They also have extensions for FireFox and Safari. It’s totally worth it to use the extension! I’ll show you in a minute how I used it last night — it makes it SUPER EASY to schedule a lot of pins.
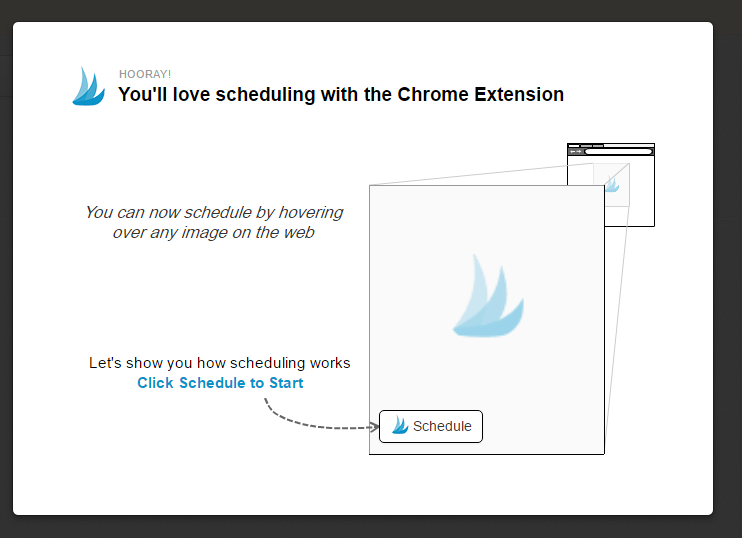
Step 5: Once the extension is installed, Tailwind will take you through a mini tutorial about scheduling a pin. Follow the steps to see how easy it is!
Step 6: Once you’ve completed the mini tutorial, this screen will pop up. I HIGHLY RECOMMEND watching the “Mastering Tailwind” Video Guide. It’s about 10 minutes long, but they walk you visually through all the steps. I’ll admit, I’m not a huge fan of video — I prefer PDFs! But I felt that they packed a TON of info into this short video and it helped me “click” with the whole program to really understand how to use it.
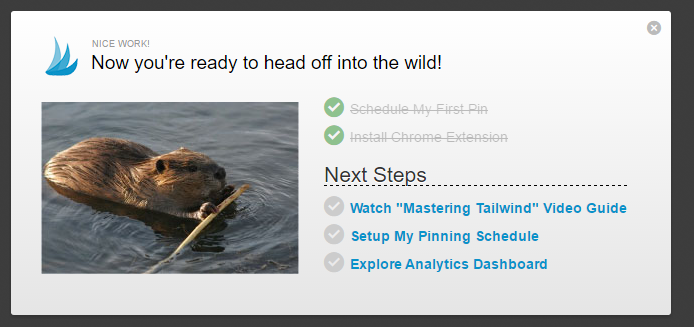
Note: If you don’t have time to watch the video now, you can find it again by clicking the Video Guide button shown in the screenshot below.

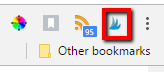
Step 7: Ok, let’s get pinning! I opened up Pinterest and did a search for Quotes as I wanted to find some more pins to add to that board. Then, I clicked the browser extension (shown below) to turn on the Tailwind app. I then just clicked on all the images I wanted to pin.
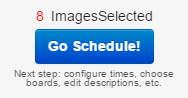
Step 8: At the bottom of my screen, there’s a count of the images I picked and a button “Go Schedule!” to click when you’re ready to put them into Tailwind and prep for scheduling.
Step 9: So the image below is from my Drafts screen in Tailwind. This is showing my eight future pins that need to be scheduled. Since they are all for the same board, in this case, I just put the name of my board in the “Add Board to All” spot. This was a super fast way to assign the right board for these pins.

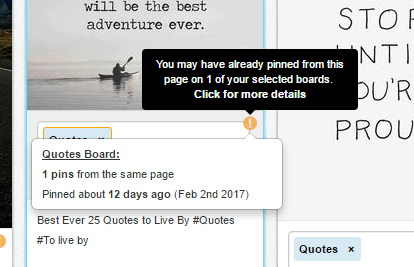
Step 10: Ok, so this is a super cool feature! Some of my pins had a yellow exclamation point on them. When I hovered over it, the black pop-up appeared telling me that I might have already pinned this. When I clicked for more details, the white pop-up appeared sharing the board and date of the pin. Nice!
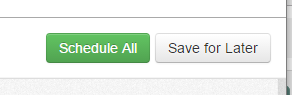
Step 11: Once you have a board assigned to each pin, review the pin descriptions to make sure that there’s nothing weird. I had a quote where the description was some rambling paragraph that had nothing to do with the quote! So just updated it. When you are ready, click the green Schedule All button.
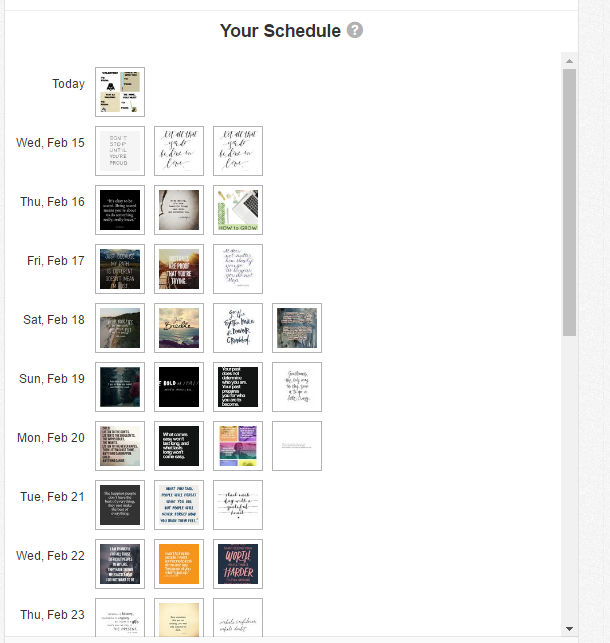
Step 12: Review your schedule! Since I didn’t have a specific date/time I wanted the pins to post, I just used the Queuing feature of Tailwind. You can see that each day has a few pins scheduled. these are the automatic time slots that Tailwind determined based on my account and what it knows of Pinterest. You can add more suggested time slots or create your own as well.
That’s it!
After doing all of this, I then went back in and scheduled over 60 more pins in about 20-30 minutes (I think). I wasn’t paying attention to the clock, too excited about my new toy! I added a few more time slots and will likely add more over the next week or two.
Again, if you need a link to Tailwind that will give you bonus time, you are welcome to use mine!
Have you any tips on using Tailwind? Please share in the comments!
~R
Hi, such an amazing ideas to start a blog on different niches. Really an useful post with clean and clear details. Thanks for sharing this post. Keep sharing.
You are welcome!
I still don’t see what this has to do with my blog on WordPress or how they interact.
Hi Lisa! Tailwind helps you pin automatically to Pinterest, it’s not connected directly to your WordPress blog. What you would do is use Tailwind to publish pins to Pinterest that link back to your blog posts, thus gaining traffic and visibility. Does that help? ~R
This is one of the most helpful posts I’ve ever read! I LOVE your site. I’m following you on all and definitely plan on sharing. Thanks for the help. I love your color scheme, ours is red, black, white too.
Aw, thanks Cheryl! I’m glad it was helpful.
What a lifesaver! I have never heard of tailwind before. Thank you for posting.
Mimi: you are welcome! hope it works out great for you!
Thanks for this! I signed up a few days ago and it’s overwhelming at first. I’m glad to know they gave a feature for duplicate pins.
Cadri: You are welcome! Be sure to watch their video as it walks you through the whole thing super easy!
Do you think Tailwind is helpful for new bloggers? I don’t have a ton of content or group boards (working on joining but trying to be strategic). I’m worried I won’t have enough places to pin to without repeating over and over and looking spammy. Is there a general minimum number of posts I should have before beginning?
Lindsay: I’m in the same boat — I post once a week and have been only since December. I’m only a part of two group boards right now, but planning on looking for more. To be honest, they say to pin 20% yours and 80% others and I’m more like 5% mine, lol. But what I love is that instead of bursts of pins here and there, my boards are growing steadily. As I have more posts and create multiple images for each post, I’ll be able to add those in as well. For my group boards, I will be adding pins to those over time. Example: this post went live on Saturday while I was on an airplane heading West. I’d scheduled the main image to pin to my boards and my group boards over the space of Saturday morning. Based on group board rules, I plan on scheduling repins of others on the group boards to my boards so that I’m sharing as much as I’m posting. I’m not too worried about duplicate pins, especially once I have multiple images, as there is a lot of activity on the boards. Hope that helps!